

H is for Holidays: Tinkerbelle Inspired No-Carve Pumpkin
This post contains affiliate links; find my full disclosure here.
When my youngest daughter Madeleine was born, she was a tiny little wisp of a baby. This came as a huge surprise as our first born was a big baby who had always been at the top of the growth charts and had a giant head (No really! It was huge!!!). My husband immediately started calling Madeleine “Tink” much to my dismay. I insisted that she would be teased for such a silly nickname, but he was convinced that she was his little Tinkerbelle and refused to drop it. I must admit that this term of affection has grown on me and really fits our sweet little Madeleine perfectly. So when the girls brought their pumpkins home from school last week for the annual family pumpkin decorating project, it seemed clear to me that we should make her a Tinkerbelle inspired pumpkin. Are you ready to make your own Tinkerbelle inspired pumpkin? Here we go:
Supplies
A small pumpkin
Paintbrush
Glue stick
Silver glitter glue or glitter pen
Straight pins
Scissors
Narrow ribbon in green or silver
Hot glue gun and glue sticks
Instructions
Carefully wash your pumpkin to remove any dirt and grime. Wipe with a soft cloth and let dry thoroughly.
The first step is to paint the pumpkin. Madeleine had a ball with this project and took her job very seriously. Look at the concentration on that sweet little face! Make sure the pumpkin is thoroughly covered in paint including the stem if you wish.

I helped to remove any extra paint that was pooling around the stem or dripping off the side and we let the paint set up for a few minutes. Next we sprinkled the whole pumpkin with fine green glitter. The paint was still tacky enough that the glitter stuck to it like a charm. This is a pretty messy endeavor. We placed the pumpkin into an old metal cake pan (that I use for crafting) before adding the glitter. This step made the glitter clean up quite easy. But let’s be real – I’m still finding glitter in the house, in my car, on my face… it is totally worth it in my opinion. Any way, let the glittered pumpkin dry thoroughly before adding the details.
Once your pumpkin is good and dry it is time to start adding the details. First we need to make the wings. Using my glue stick, I glued two sheets of green cardstock together to make the wings as sturdy as possible. I folded the double sheet in half and drew the outline of one wing along the folded edge. I cut the wing out knowing that the folded edge would be where I would attach the wings to the pumpkin. Open up the wings and lay them flat. Using a silver glitter pen or silver glitter glue, draw swirls and designs over the entire surface of the wings. Let dry thoroughly.
While the wings were drying, I used a dry paint brush to dust off any loose or excess glitter. Once the glitter glue has dried completely, fold your wings along the crease and attach to the back of your pumpkin using straight pins. I put one pin at the top of the crease and one pin at the bottom. This seemed plenty secure to keep the wings from moving.
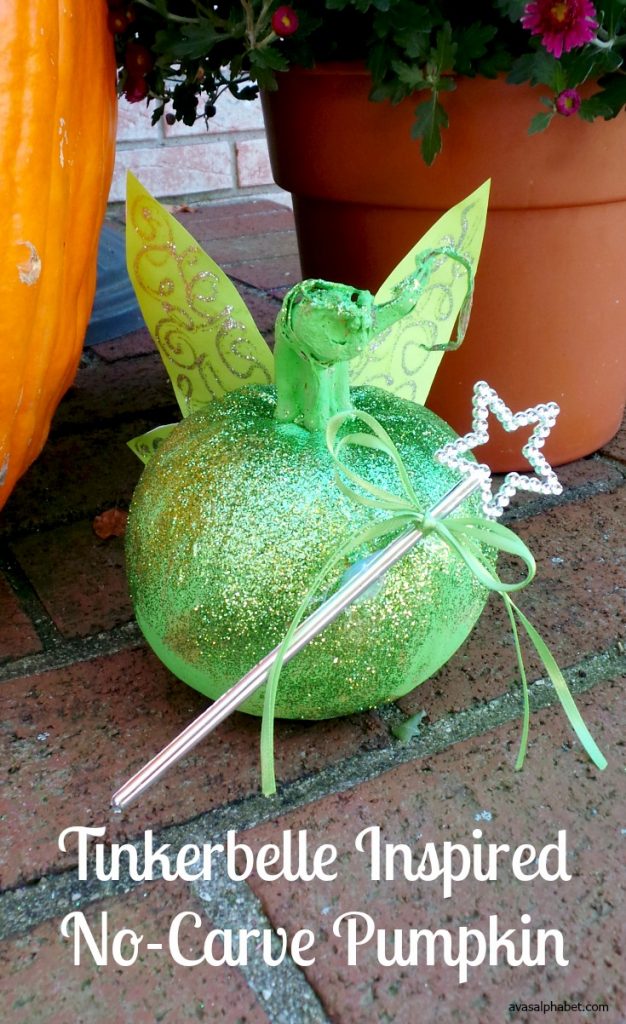
Next I added the wand to the front of the pumpkin. I happened to have this little wand on hand leftover from some photo booth props. Toy wands should be fairly easy to find at a party supply store, novelty store or even the dollar store. Tie a few strands of fine ribbon in a bow around the wand for an added touch. Attach the wand to the front of the pumpkin using a dab of hot glue. And there you have it – a Tinkerbelle inspired no-carve pumpkin that is fit for a fairy or a princess.

I am pleased as can be with how this Tinkerbelle inspired pumpkin turned out and it has been a big hit at school so far. I hope you found this tutorial on how to make a Tinkerbelle inspired no-carve pumpkin helpful. As always, I am open to feedback and questions in the comment section. Wishing you and your family a safe and fun Halloween season!
My posts are partying at these fun Link Parties and Blog Hops!


Very cute! Who doesn’t love Tinkerbelle? I think its a cute nickname!
Thanks so much! I really have grown to love the nickname too. I’m so glad you stopped by with a comment. Hope you are having a great week!
This is adorable! I have never seen your blog before. Your pumpkin is amazing and oh so beautiful. I enjoyed your post!
Thank you, Valerie. It is nice to “meet” you and I am so glad you stopped by with a comment. We would love to have you join us for the Family Joy Blog Link-Up Party every Sunday at noon EST through Wednesday at 2pm EST on Ava’s Alphabet and seven other awesome blogs. Hope you are having a great week. 🙂